
audibobby
Free
-
Joined
-
Last visited
-
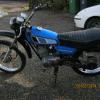 I have the same bike in the same colour and also a 1977 example. I have the parts list for it if you would like it. Not sure how I can send the file to you but happy to do so if someone can tell me how to do it. Just got mine registered in the UK (it came in from Belgium) on a R plate and looking forward to the warmer months.
 -
There is a great video guide for the right hand side which I followed and it made it really easy. Just follow it to the letter and you can't go wrong.
-
Just a quick conclusion on this one guys. Did the pressure test and it wouldn't even pressurise so I rang my local seal and bearing merchants and they stock the seals at a fraction of the cost of Yamaha genuine parts. £6.25 inc VAT for BOTH sides. Set to work and changed them both in about 2 hours at a steady and careful pace and pressure tested after each side. The difference is unbelievable and the bike now idles at 1500 revs and is as sweet as a nut. She is now ready to go and will get her chance later in the week all being well. A job I was dreading turned out to be pretty straightforward.
-
That's what I was hoping to hear She revs away when the choke is closed down so will do a vac and pressure test to pinpoint the air leak and change them if that's where it is. I suspect the L/H one as the condition improves when the cover is replaced although there was no crap or oil behind the casing when I removed it. Thanks for the info blackhat.........much appreciated mate.
-
Forgive me if this has been covered before and I'm sure it has but can anyone tell me if the crank seals can be replaced without splitting the cases on the DT125 1977 1G0 engine. Any experiences of this would be much appreciated. Thanks guys
-
Just to add, I think I found the point where the old unit was earthing and will re lacquer and re assemble when I get time. Hopefully this will give me a spare for future use as these are like hens teeth to source. Thanks for all your input on this topic, it was all very much appreciated and it's great to know that help is there when needed.........thanks again guys.
-
OK here we go with the update........... ran through everything again with the multimeter and found my problem. Can't believe I missed the glaring fault that would have saved me hours and a few quid to boot. The starter coil had a short to earth through the starter generator housing and as both coils are used simultaneously when running then it follows that the charging coil was also earthed and therefore no start and no charge once running. I can only think it was my enthusiasm to get her running and get on her that caused this schoolboy error but as they say "you live and learn". I started to strip out the magnets from the stator assembly with a view to re coating them in insulating lacquer and was mid way through this operation when a used starter generator unit popped up on fleabay. Got it delivered for £45 and all is now running and charging as it should She even starts using the leccy start but not using that as I don't want to break it again. If anyone else has the same problems with the DT125E then here is what you should be looking for from the starter generator assembly using a multimeter. Separate all the leads from the main terminal block on the face of the starter generator unit and then measure resistance between both the thicker tabs protruding from rear of the actual unit through the cut outs just above the terminal block. Make sure nothing else is touching these tabs other than your test probes and the resistance should be 0 ohms or very very close. This is the starter coil. There should be no continuity to earth from either of these tabs (easy for me to say that now ) Next take a reading between the other two thinner tabs coming through from the rear of the unit. The resistance should be around 4.8 ohms plus or minus 10%. This is the charging coil and again should have no continuity to earth. If all these readings are ok and you have triple triple checked them then the stator is ok and not at fault. Hope my slack effort helps someone by being a lesson in the dangers of overlooking the basics and jumping to the more complicated stuff to find the fault.
-
Perfectly normal............they are meant to do that, it's only a problem if the oil light comes on when the bike is in gear as this indicates low oil in the oil tank.
-
Hi again guys, been so busy with work that the bike has taken a back seat but will post updates when I get going on her again.
-
Just a quick update for anyone who may be interested. I checked the stator magnets and they do pull when energised so they are electro magnets as opposed to permanent magnets and are working ok. Having read up on the generator side of things, I did not realise that the regulator energises the magnets to whatever level they need to be to supply the voltage required to service the load. I checked the pull of the magnets by energising the starter coil and so I am thinking that they are not being energised at all by the regulator. Could this be the problem, a duff regulator?? I have one coming this week so stay tuned for hopefully the conclusion of this saga
-
Thanks for the advice Cynic. I will get shut of the leccy start wiring come what may but just need the unit to generate enough energy to charge the battery. The output voltage at the minute is 0.1 volts and should be 14!!! Something is clearly not working at all as opposed to not working to full potential.
-
One thing I have noticed is that the magnets in the stator assembly do not attract. They Will not even hold a paper clip. Does anyone know if this is normal and do the magnets only pull when they are energised? I will test this by energising the coils when the stator is removed and see if the magnets pull. If not then I think that is where my problem lays. I will report my findings but any other ideas are welcome.
-
She starts on the kickstart and has a brand new fully charged battery but there is no charge to the battery whilst she is running so eventually the battery would drain and she would die. The guy I spoke to at Rex speed shop told me that the best thing to do would be to get rid of the starter/generator setup and source a generator from a DT125 of the same age that was made without the electric start. He also said that in his opinion the engine would probably last longer without the very heavy armature on the end of the crank. To be honest, working up a sweat kicking over the bike for ten minutes and then realising the engine cut out switch is in the off position is half the fun I do appreciate what you're saying about the battery needing to be good to turn the engine on the starter though.
-
Will do that when I get round to it. It would probably be quite helpful as apparently it is a common problem on bikes with the starter/generator.
-
Thanks for that mate. Gave them a call and they gave me some good advice and another contact number but apparently I can ditch the electric starter and fit a regular DT125 generator which would be ideal. Thanks again and if anyone else has any ideas or points to make then I'm all ears.
