


NE0
YOC Member
-
Joined
-
Last visited
Everything posted by NE0
-
Been having a few problems posting, Alex put me on the right path, seems to be sorted now. Here's the post I was trying to post several days ago! in reply to the photo of the back of Alexs bike earlier...... Well, at least there is a bit more tread! That number plate ...YOC?...Yamaha Owners Club? Is that for shows or is it road legal in Oz? We have a different system here in the UK. I doubt that would have been an available number even back in the day of the early number plate registrations. The registration "A1" being the very first reg I believe. So anything like YOC would be for shows only.
-
It may be the angle of the camera...but is there any tread left on those tyres Alex?😂
-
Merry Christmas Folks and a great New Year 2026.
-
Nice read there Mr B, and many thanks for taking the time to write that out, all to common is a few lines with little content, I'm glad to see there are still some of us that like to write a little bit more. I for one can get carried away with an explanation, and it takes time to compose and write it out. I'm not particularly quick on the keyboard so i appreciate your efforts, well done sir. Nice to see that you owned a 400/4 too. I've still got mine and i like to think it still looks good. What area did all these memories come from,? and what coast are you referring to? I'm down on the South Coast and have not really ventured far from my home town of Brighton, and still live not far from there. I have a similar story to tell, with a group of fellow early riders; Vespa 50 and Honda SS 50, along with Fizzy and Crazy Pete on a Lambretta. Maybe I'll write it down one day. In the meantime, I'll re read your post for some more inspiration. Many thanks.
-
and a warm welcome from me too.! as regards to cleaning aluminium .....errr, i do!😂 Now to be fair you've not giving much away to what you're cleaning!! Equally, the question of How do you clean the top of the engine , is open to interpretation!! Are you asking , how do you clean it? as in "How do you get in all the nooks and crannys?" With a hose? a jet washer? a toothbrush? take the tank off?, that sort of how...or... do you mean "How do you clean it when it's dirty?", as in what products do we owners use? I'm not being funny, its just that I can read it both ways! and I'm sure others would agree. Nonetheless, I'll answer on the basis you're asking what do we use (products) to clean it....... I've got two bikes; both with aluminium heads. However one is painted black and the other is polished ali, but both need cleaning! The DT 175 MX has a black painted ali head. Over time , despite being painted, little areas of oxidisation can break through the paint film, I keep it clean with soap and water, you have to be careful not to use anything too abrasive as the paint can dull, nonetheless, I don't go overboard on it! although if you left it the oxidisation creates little mounds of crystals which you can rub off in the early stages, leave it too long and you'll need a wire brush!!! however, sometimes it needs a bit of a touch up with a rattle can of Engine black satin enamel paint. My 400/4 , that's a Honda not a Yamaha!!, has the polished ali head, which when new probably had a clear lacquer coating on it, but that went yellow with the heat and was removed years ago, thereafter, I polished the ali with Autosol Chrome cleaner paste and a lot of elbow grease!!!, again, I keep it clean with soap and water then apply the polish, over winter a spray of ACF50 protects it. Both simple routines, but I've been doing that for over 40 years and it seems to work for me! Incidentally, don't waste your money on fancy named cleaners that cost a lot, I just use washing up liquid and hot water! Elbow grease is cheap and effective.! If you're asking How? jet wash?, hose?...I'll leave that for later depending on what you think of my first answer! Hope that helps.
-
So Roger the Bodger was a previous owner of the bike!! Whilst his putty job got it going it didn't fix it.....then you bought it!....and now the Wallet Emptying Barsteward is finally fixed. Congratulations. Well done that man. You deserve a medal for perseverance............medal....medal!! says Mutley 👍👍
-
Five replies from 3 members out of over 50,000 from all over the Planet! 🙄
-
....and a warm welcome from me too. Well Gary we're not saying it's that quiet here but with two replies this is the most popular post we've had this week🤣🤣
-
Not sure what was going on but a couple of weeks ago, i was typing replies but they wouldn't upload/show up!! I informed Alex but they seemed to have resolved as i have been able to post since, most odd.!!
-
Good one, all Resolved. (This post is also a test to see if i can post, as i've been having trouble)
-
-
A warm welcome from me too.
-
Alex lives on the other side of the planet so you need to take that into account regards to his replies!
-
Hi Michael, welcome in, with two posts already to your name, you can consider yourself a regular!!! Its a bit quiet here these days!, Nonetheless, the answer to your question is in two parts, firstly on the top right is the search function, typing in NOVA will bring up previous posts from others seeking the same question, then secondly, they tend to point you to this website for your answer. https://www.motorbikeregistrations.co.uk/ hope that helps .
-
Well done, thats an amazing job!! really nice to see, Having restored my bikes (not recently) they do have a tendancy to becomeing WEB's !! Wallet Emptying Barstewards!! So your rebuild wasn't cheap, but money well spent. Congratulations Shaun
-
Ahhh yes I see the pin now!!! didn't spot it!! makes sense, that its the first post AFTER the pinned posts....As an alternative possible solution? maybe the pinned posts could have a subtle coloured background panel as a visible indicator. something like that? ...just a suggestion.
-
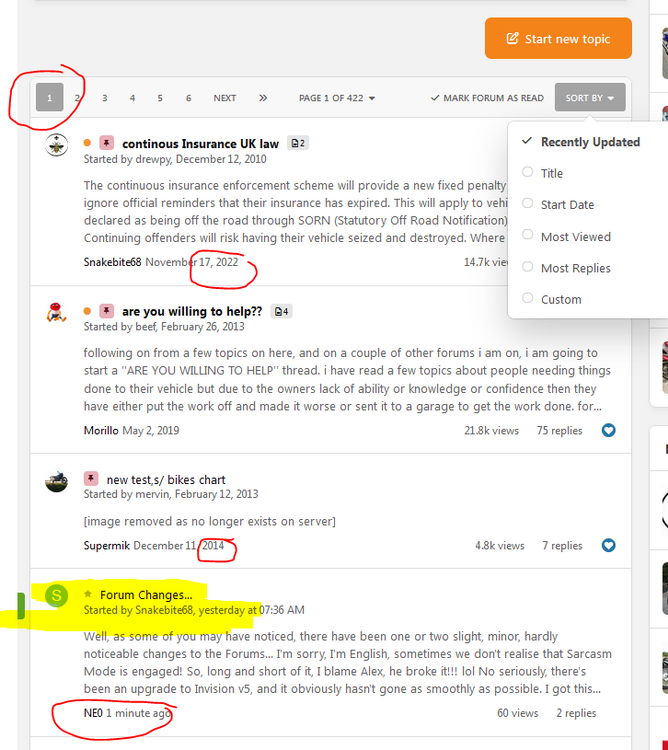
Well, as some of you may have noticed, there have been one or two slight, minor, hardly noticeable changes to the Forums... Nope hadn't noticed any changes!🤣🤣 Here's one for you Alex, having just posted , if you go to the Bar, and sort into Recently Updated, then this topic should be at the top of the page...but it's not! 😆 ..and its not just restricted to the bar.... I've replied to the topic from Dutch and again its not sorting with the most recent post at the Top.
-
Thought that was going to be a happy ending!! 🤣
-
Where as.....I'm older than I look!!😂
-
Because I looked on ebay at the Lithuania one, the seller offered it to me for £40. I thought it looked in reasonable condition for the price. Presumably George must be busy as he hasn't been back to view this topic, hopefully he won't miss out.
-
Hi there, firstly welcome in George. Secondly not much to go on... which country are you in? The site is Worldwide. The owner/publisher of this website is in Australia. Members are in the US, UK and everywhere else! Which year FzX750 have you got? I see they are listed on CMSNL as 1987 to 1993. and on ebay.com sellers list them as 1986-1987. You're looking for bike parts that are over 30 years old, are you looking at OEM parts or parts that will fit ? If you live in the UK then I found two abroad..... I see there is one in france...£150 https://www.ebay.co.uk/itm/276845779353?_skw=fzx750+headlamp&itmmeta=01JKR5JM9AKFTJ4PCSG3335X7N&hash=item40754b5999:g:45UAAeSwC4NnpLRm&itmprp=enc%3AAQAJAAAA0HoV3kP08IDx%2BKZ9MfhVJKk%2FSU3oRjaca0qaMjgpHhgXG%2FDGCYwDwnPZF6QLV5FxbPmREunxQXDeykUM91nsEcc7rjjZf%2FqAWiNEiFFwVL4XFGi23xd1EtPw9tp2gQMSzxe%2BIFEVyawcllwl8pDZ1s6DEEzzcmbTJyk7euc2gDbDzPK2nZkREaP%2BdhN4RPn1e%2Fafzlchpkrv52cezKDff3RiEOogJa%2BT1SAmLBTsx6h2LI4pEoqga6yMiZdBnU98W3zaxWjfn4vrNE9sokHBZik%3D|tkp%3ABk9SR_DEyoWeZQ and another in Lithuania for under £50 https://www.ebay.co.uk/itm/304754105332?_skw=fzx750+headlamp&itmmeta=01JKR5JM9DK7FKD5ANVSPREBGX&hash=item46f4c29bf4:g:c48AAOSwpotivgsZ&itmprp=enc%3AAQAJAAAA0HoV3kP08IDx%2BKZ9MfhVJKkSAJzo5n5taTf7qnX1ydWk3oQQnhKxvE4E30QzoFIy1Be9uTKAcSkMreiy9aYnxpLTWfd3ziJaJsS3GQVdd%2B0g6Uw%2BGeIhOpufouGx7K5dRGdXWe%2BJMeAL2T0ePgXDQc0qVXogyB7rzAq406Ej9tBoBjKRlU%2F6BQWvgQc%2BpwMfGlzW3lT2HFymLu0iHmjhiBmm5n2bTM9aFsHRS2pgFTjtjgsky0s0U%2B6Vao5DsWWXdscZpTnTyamzW9ubtUH%2BWgk%3D|tkp%3ABk9SR_rEyoWeZQ But if you live in the US, then yes the postage will be much higher. Hope that helps.
-
Rubber parts are often the most expensive parts of a bike thats for sure!! I see Fowlers have them on ebay! as you say not cheap £53 each!! but they do list them, heres number 2, the others are listed also. i guess you've probably seen them. https://www.ebay.co.uk/itm/362541278424?fits=UKM_Make%3AYamaha&_skw=yamaha+fj1200+air&epid=23026296538&itmmeta=01JKNBCV502QQ7R7N5H5VQQ5QG&hash=item546924e4d8:g:NuYAAOSwaZdmAunf&itmprp=enc%3AAQAJAAAA0HoV3kP08IDx%2BKZ9MfhVJKl3Z%2BXqmaqMUuOecYnyH3yb2U7p421Z4QDd7Qsn%2BoKPW2MIik4O6ekDqbd%2BjkKJYGCJxc0ulj9M7BwWufGD7txEYpLOUB5S3msnSYktZlZ55PKkz9LzFJWA1VDFwpJWP60ns0uQViKNFuCGKwZa3QwAENwgiLwIUzjiHU4R%2FelXKQkZEJrYXo9wL5GQZ05oeVBpPUQ3OXMiHTG%2F6nAZ8Wn4upsKfbog5vVsUY8PNbHawNOGw1E6NB0gUkQZESKfBfk%3D|tkp%3ABk9SR-ays6udZQ
-
yeah its odd Dutch but...'oil' air filters are, instead of paper elements to trap the dirt particles, oil is used over a wire mesh like steel wool to trap the dirt particles. The proper name, is Wet air filters and Dry air filters. Replaceable Paper elements were first introduced in the 60's/70's for cars and it wasn't uncommon to have the early model versions of the car with Wet air filters and the later production ones being Dry filters, now of course they are all dry. With paper filters you replace the paper element, and with oil filters, you wash out the wire wool part and replenish the oil. Both require maintenance to remain effective at trapping the dirt. ...and oil tends to get outside of the filter and the once clean looking chrome/steel, ends up being black and dirty and require cleaning !!....but at least they won't rust!! I notice on your two ebay links, the first one has a black sock to cover them up and hide them!! whereas the second link shows nice steel wire/mesh without oil, that will look black after they start doing their job and only look nice and shiney on the first day!!🤣
-
I know about standard bulbs on bikes but not LED's, so go with Snakes posts for advice, however, i did a search on the forum using the search feature at the top and found quite a bit, but this post may be of some help, especially as snake also mentioned the bulb on the dashboard. see the last entry in this post.
-
That is good news Digger. Warped new plates who would have thought it?! Glad you're back on the road. Happy new Year to you, Safe riding. 👍


